Introduction
Curious about StarTree Cloud and how to get started? You’re in the right place! StarTree Cloud is a fully managed real-time analytics platform built on Apache Pinot. If you’re into large datasets and real-time insights, this platform has you covered with real-time analytics, easy scaling, and fast queries.
What is StarTree Cloud?
Our public cloud option is a great way to experiment without deploying anything. You can connect it to your data sources, like S3, Kafka, or BigQuery, and start building queries and dashboards quickly. It’s perfect for anyone looking to prototype.
Getting started with StarTree Cloud

This is a simple scenario, where we will be using batch data from an S3 bucket, ingest into StarTree Cloud, and create a dashboard using SuperSet deployed on EC2.
Prerequisite
To follow along with this example, you will need:
- An already configured S3 bucket with your data. Note that you will need data with at least one date or time field for Apache Pinot. Allied formats include AVRO, CSV, JSON, ORC or PARQUET.
- Superset deployed on AWS. Note that this can be EC2 or EC3, depending on your needs.
- StarTree Cloud account (explained below)
Step 1: Setting up StarTree Cloud
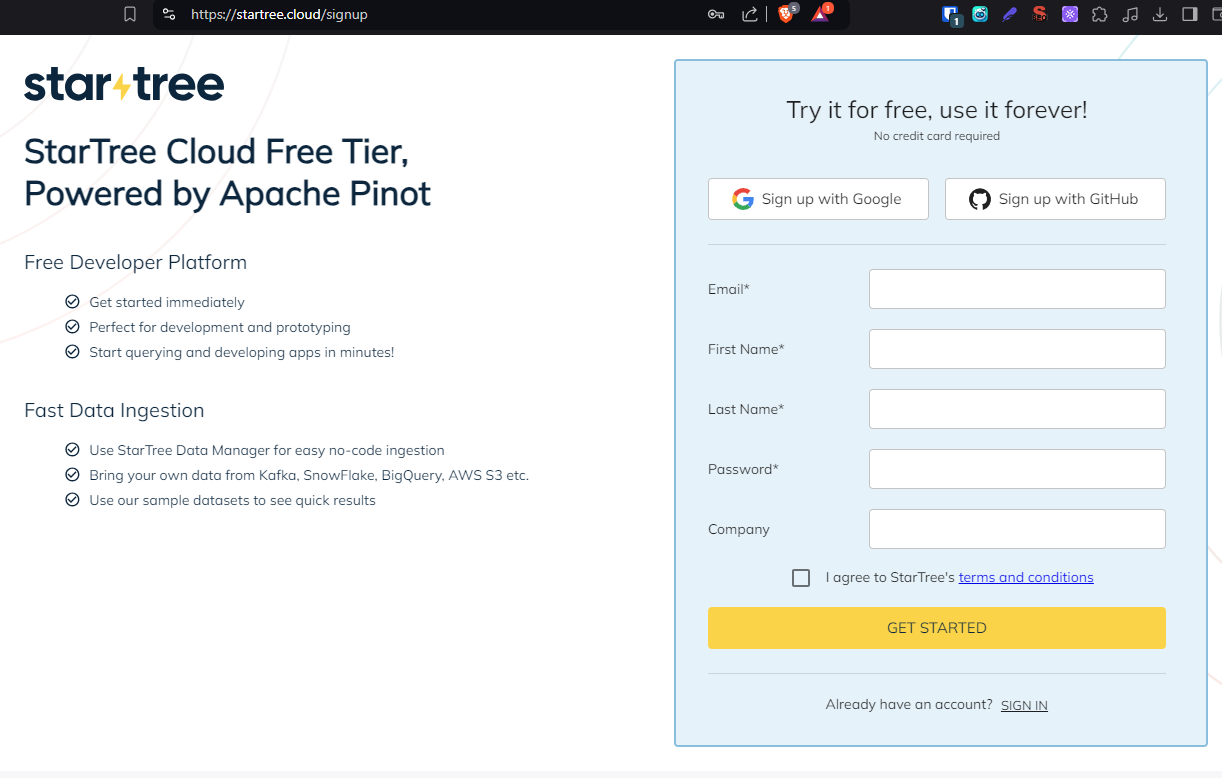
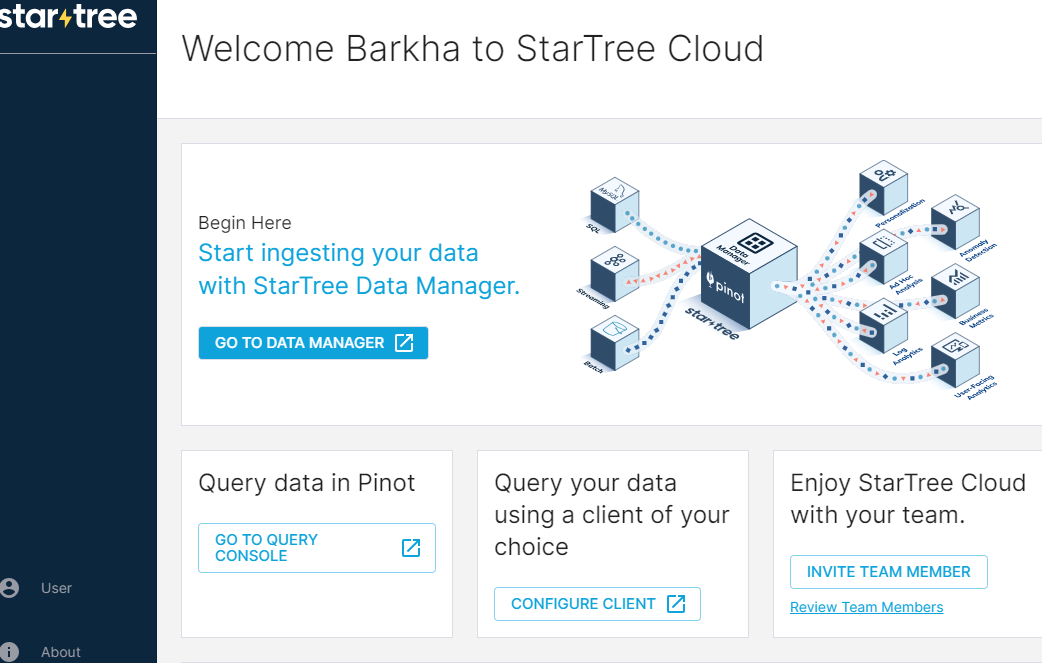
To get started with StarTree cloud, request a trial account. Once you’re in, you’ll find everything you need to create datasets from your data sources. I used an Amazon S3 bucket as an example, but you can also ingest data from files or even REST APIs.
Step 2: Ingesting data
To create a dataset, just go to the Data Manager, connect to your S3 bucket, and follow the prompts. The setup is simple — just ensure your dataset has a date or time field, which Pinot needs to work its magic.
Next, we will be creating datasets using Data Manager.
How to ingest data using Data Manager
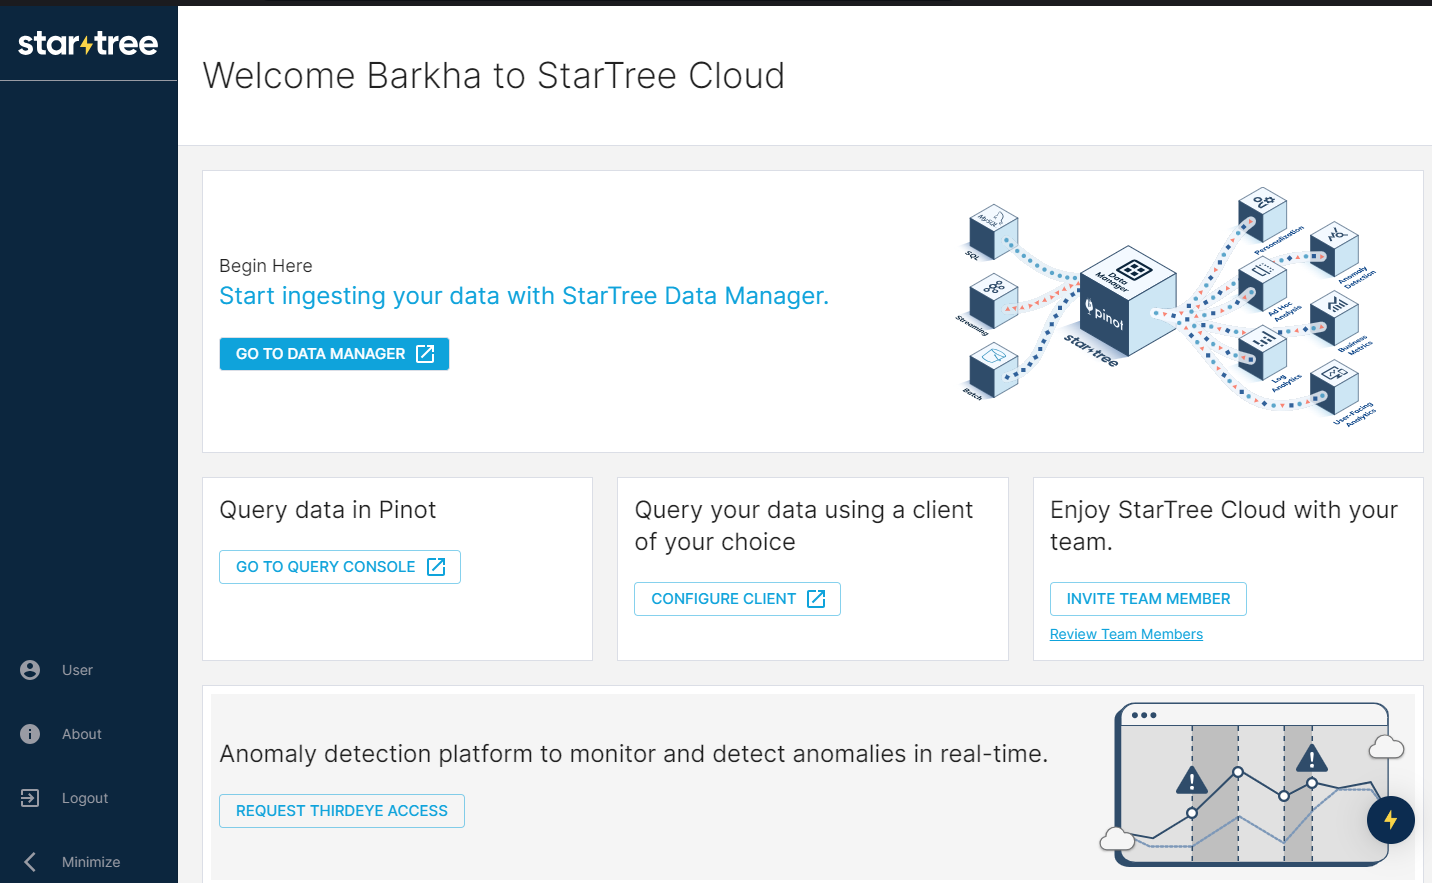
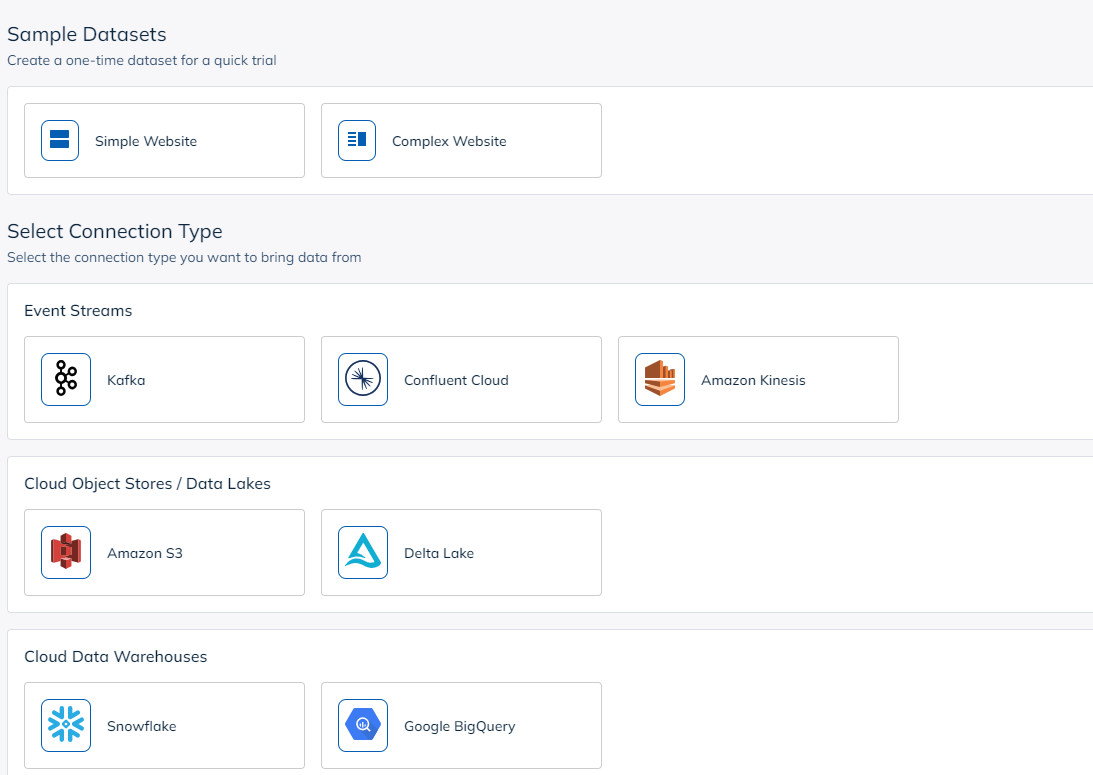
Let’s start by creating a dataset based on an Amazon S3 bucket. Click on the Data Manager button to launch Data Manager.
Once in Data Manager, click Create Dataset to get started. You will see several options for creating a dataset. Select the Amazon S3 option.
If you do not have an existing connection to Amazon S3, you can create a new connection by providing a connection name. Ensure you fill in the region, bucket, access key, and secret key.
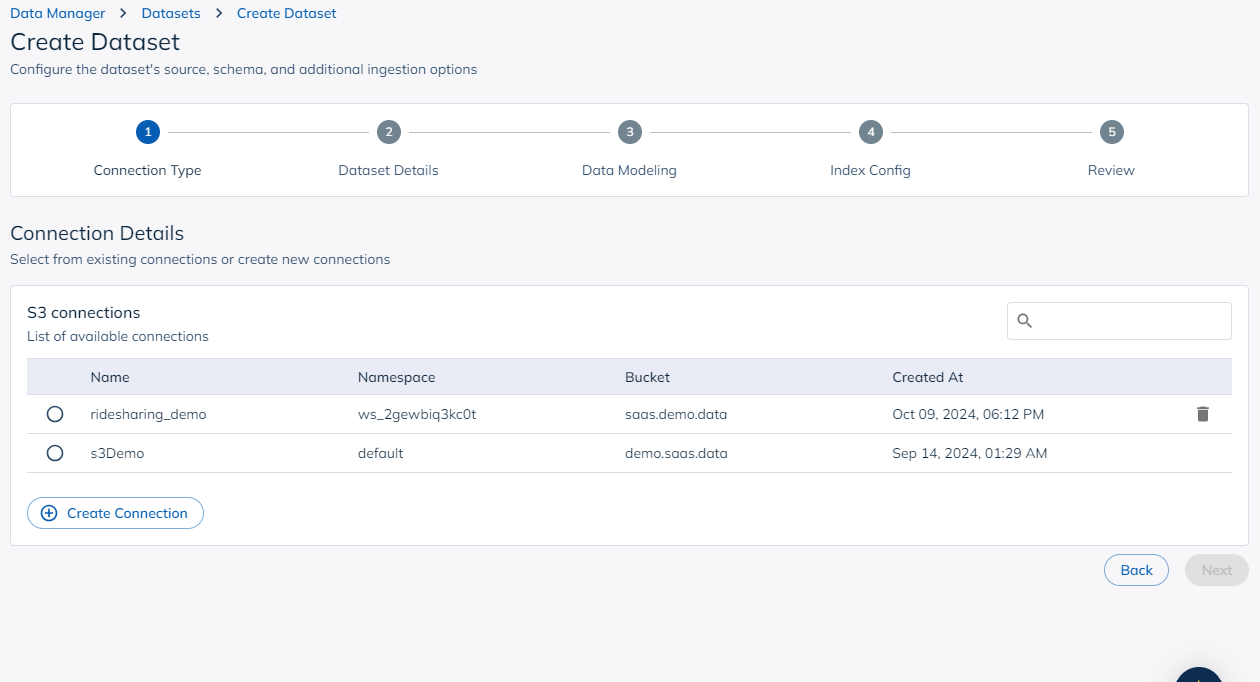
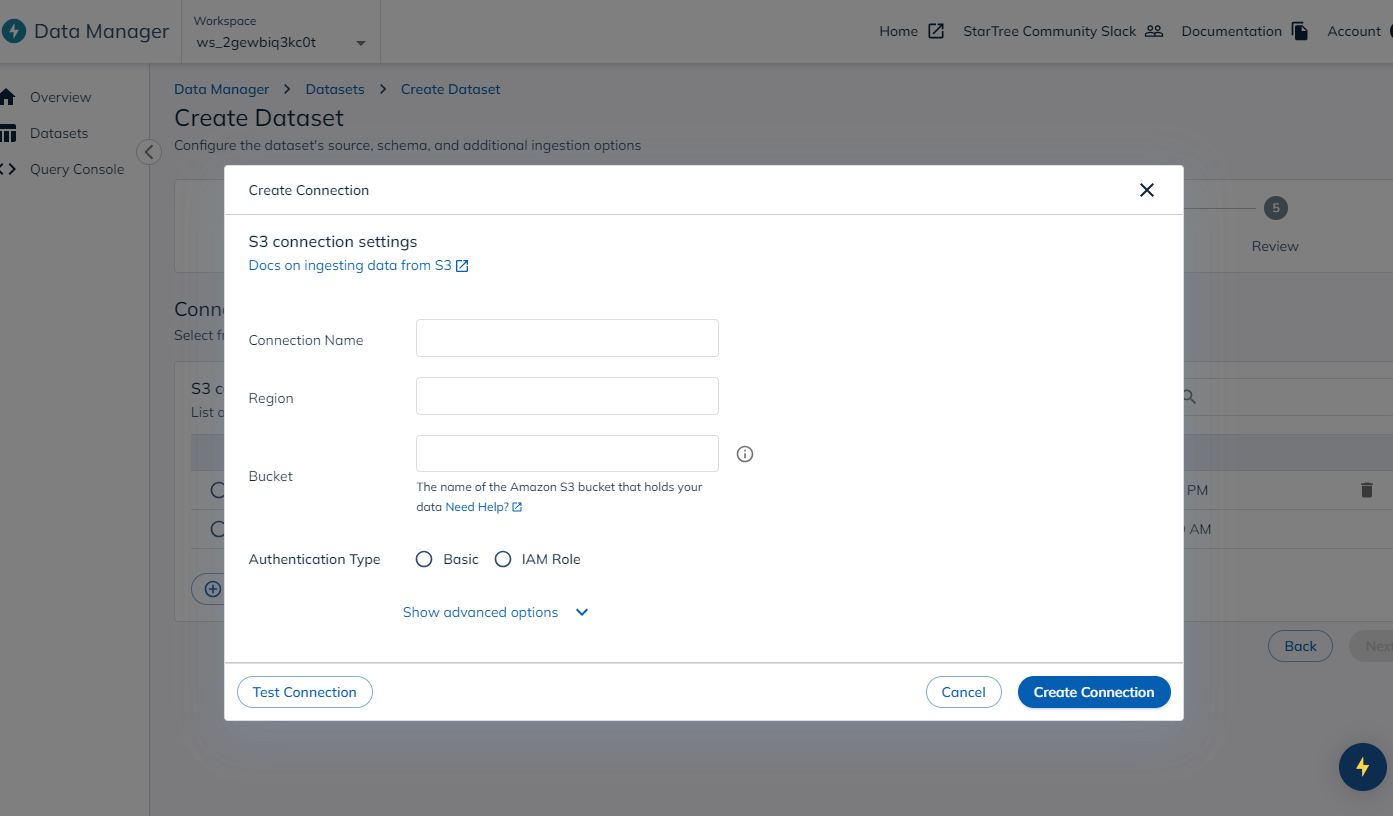
Once you have added the connection name, region, bucket name, and credentials, test the connection to ensure it works.
Next, provide a name for your dataset, and select the folder where your data resides.
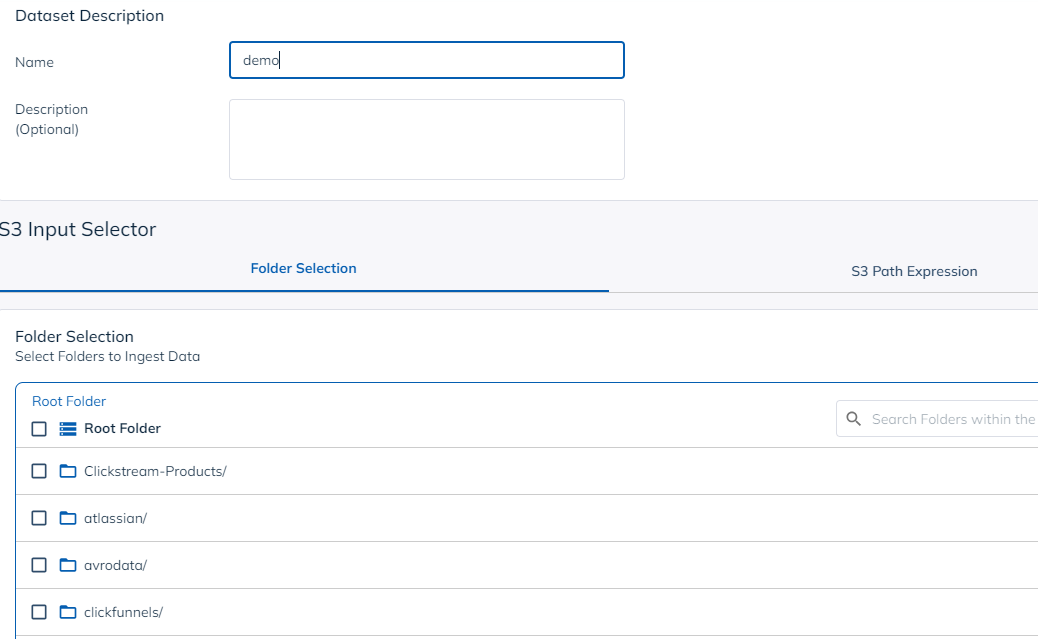
You will also need to add the data type, and check the data before proceeding.
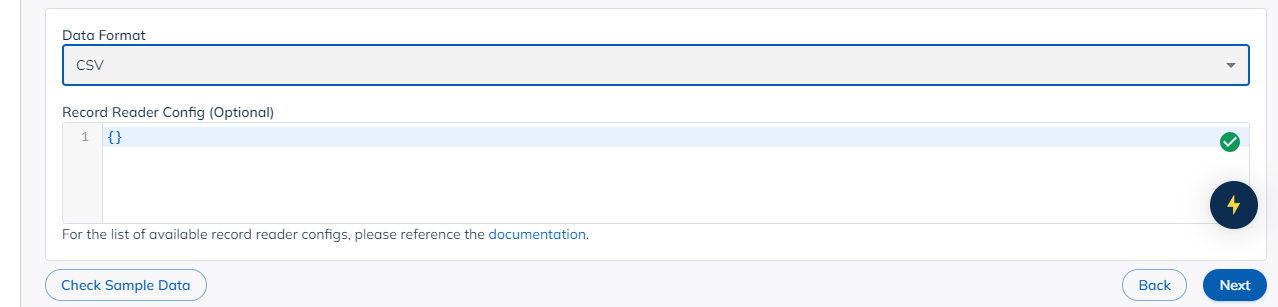
Press next to get to the next screen.
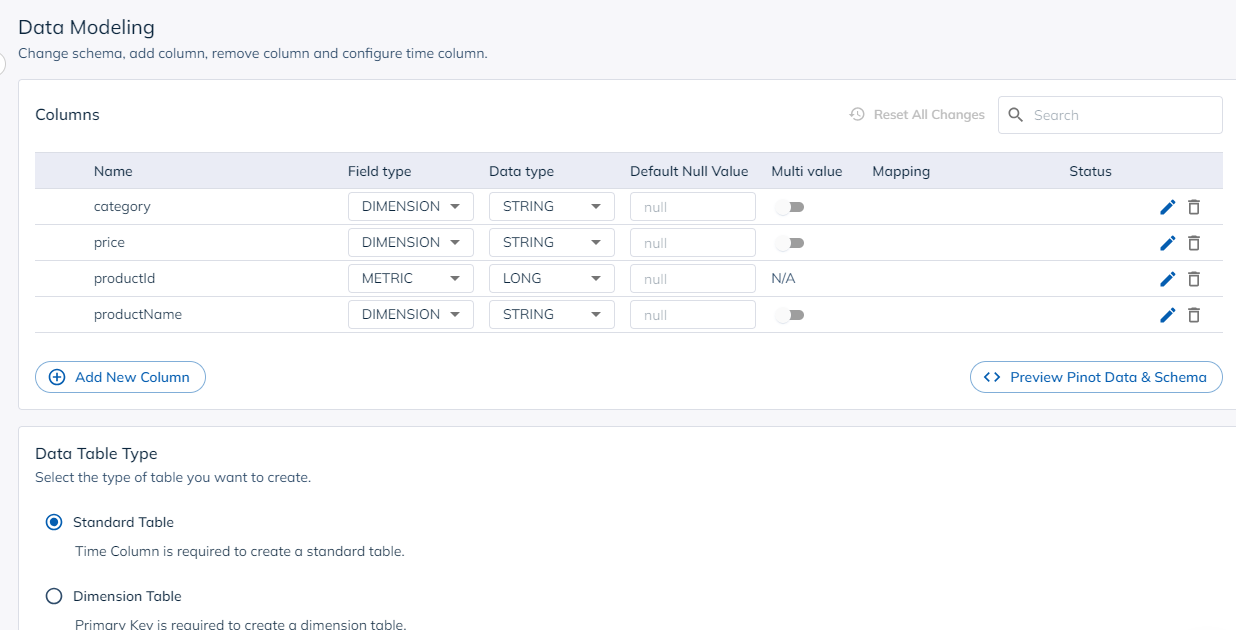
The Data Modeling screen allows you to change column names, types as well as add derived columns and transformations.
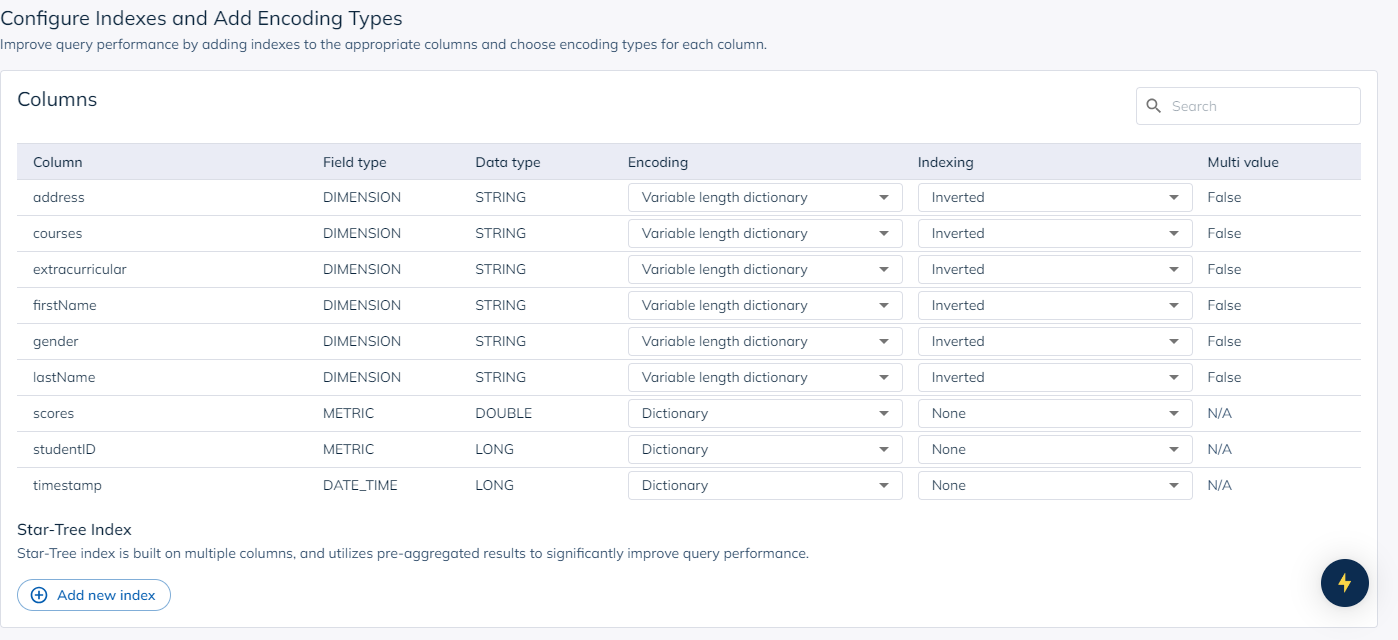
Next is the indexing and encoding screen. Here you can see the types of indexes configured by the Data Manager and the default encoding of data. You can add or change indexes, as well as change encodings here.
Apache Pinot has a lot of index types, which help Pinot achieve the performance needed for modern applications at scale. Find out more about Apache Pinot Indexes here.
Encoding dictates how data is stored and accessed within Pinot. They could also limit certain operations on data.
In addition to this, you can also set some parameters such as how often to sync the data from your source, how long to retain the data, and how many copies of the data to make.

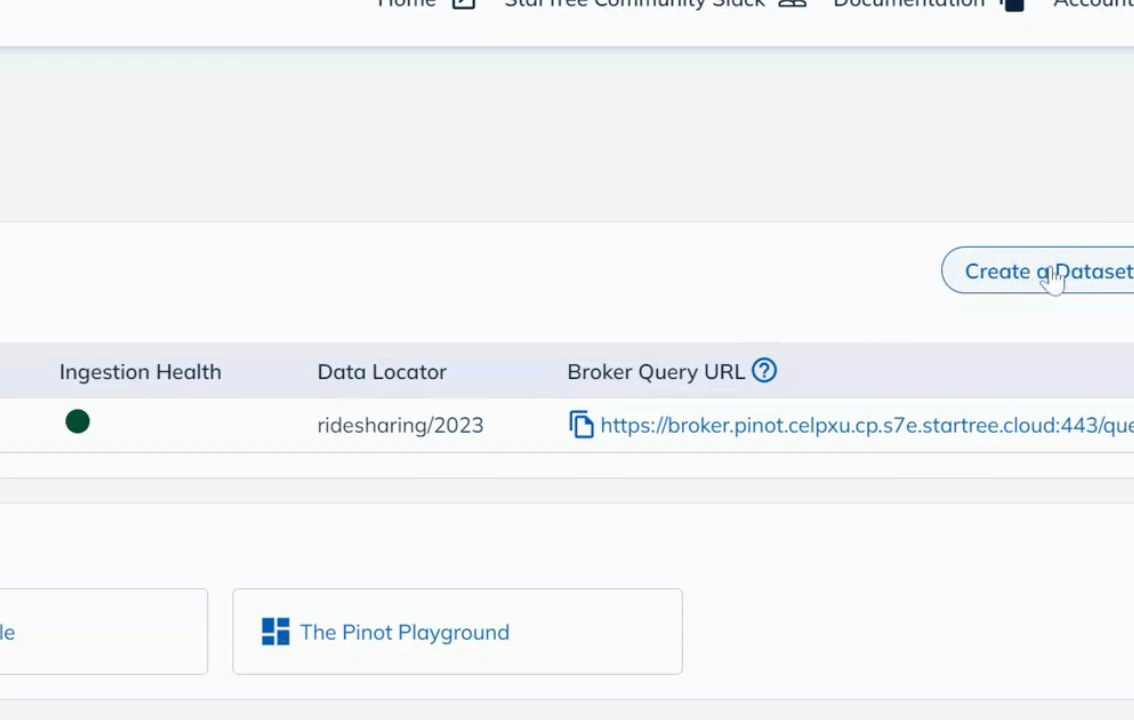
And voila! You are ready to create your dataset!
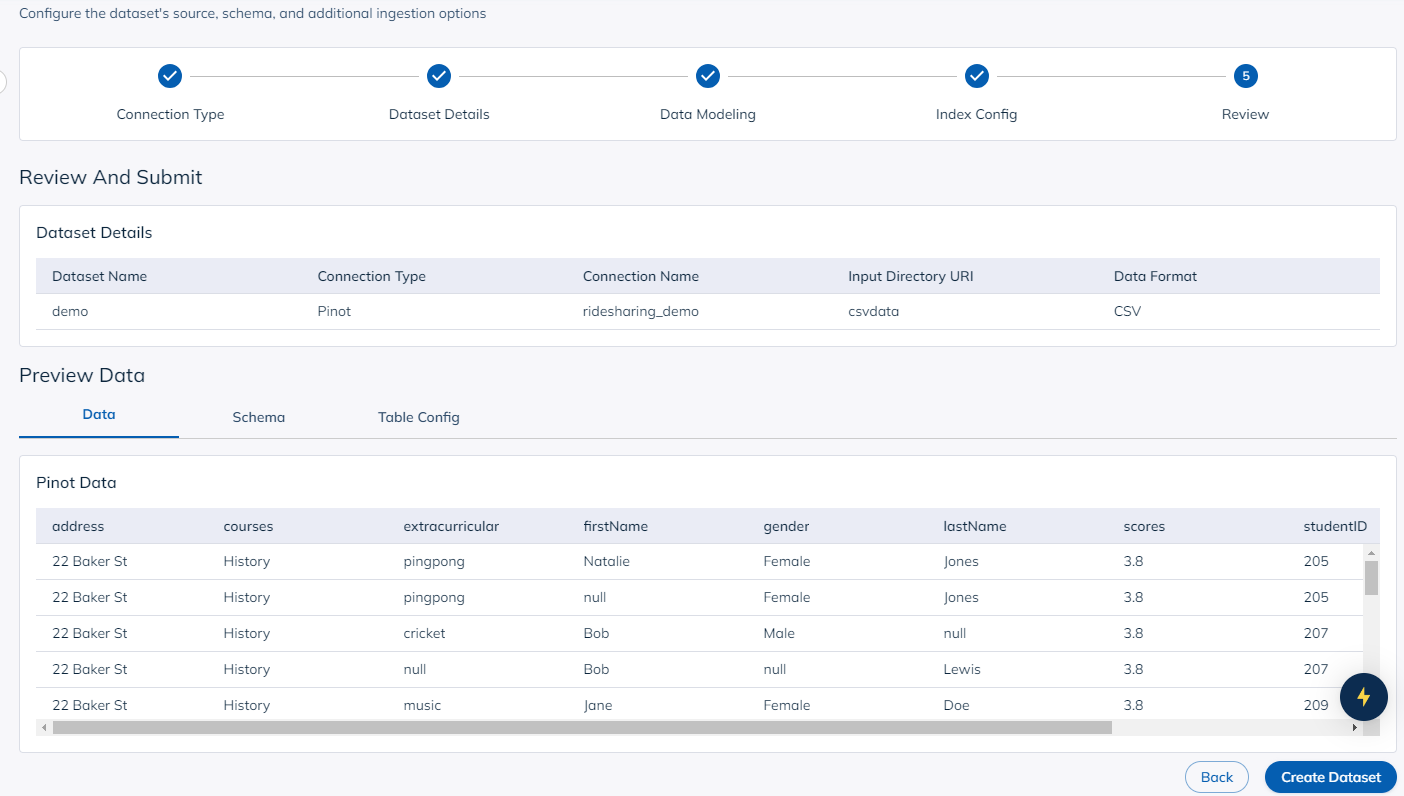
This process is doing two things behind the scenes — creating the schema and table, and ingesting data. While the schema and table are created quickly, the ingestion might take a few minutes to process, depending on resource availability and the size of the data.

Once the data is ingested, you can navigate to the Query Console to examine your data.
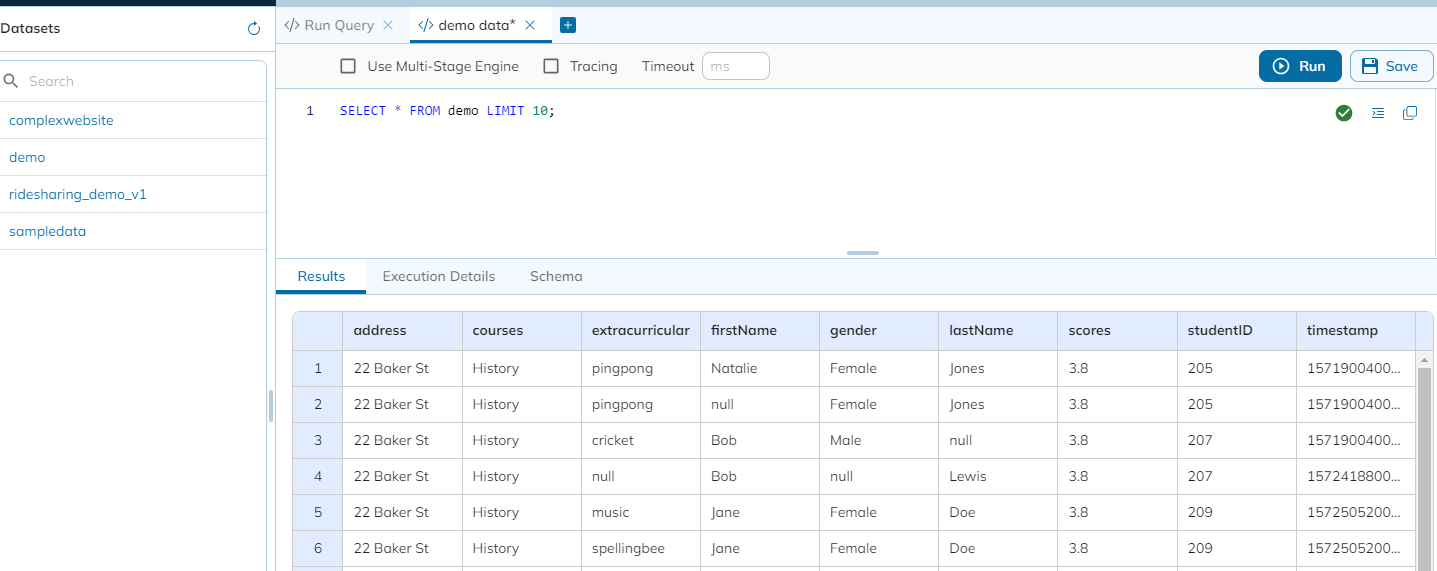
There you have it! Your data is all set to be used.
Creating a Superset dashboard
Now for the fun part — dashboards! Superset is a great tool for visualizing your data. Once you’ve got your data in StarTree Cloud, you can deploy Superset (on AWS EC2 or EC3) and create some stunning visual dashboards.
Note that in order to use Apache Pinot connector for Superset, use the following docker image:
apachepinot/pinot-superset:latestOnce deployed, you will need to create a Superset user, and upgrade and initialize the platform, using the following commands in the container:
superset fab create-admin --username <username> --firstname <firstname>--lastname <lastname> --email <email> --password <password>
superset db upgrade
superset initCode language: HTML, XML (xml)
At this point, you should be able to navigate to your container URL:

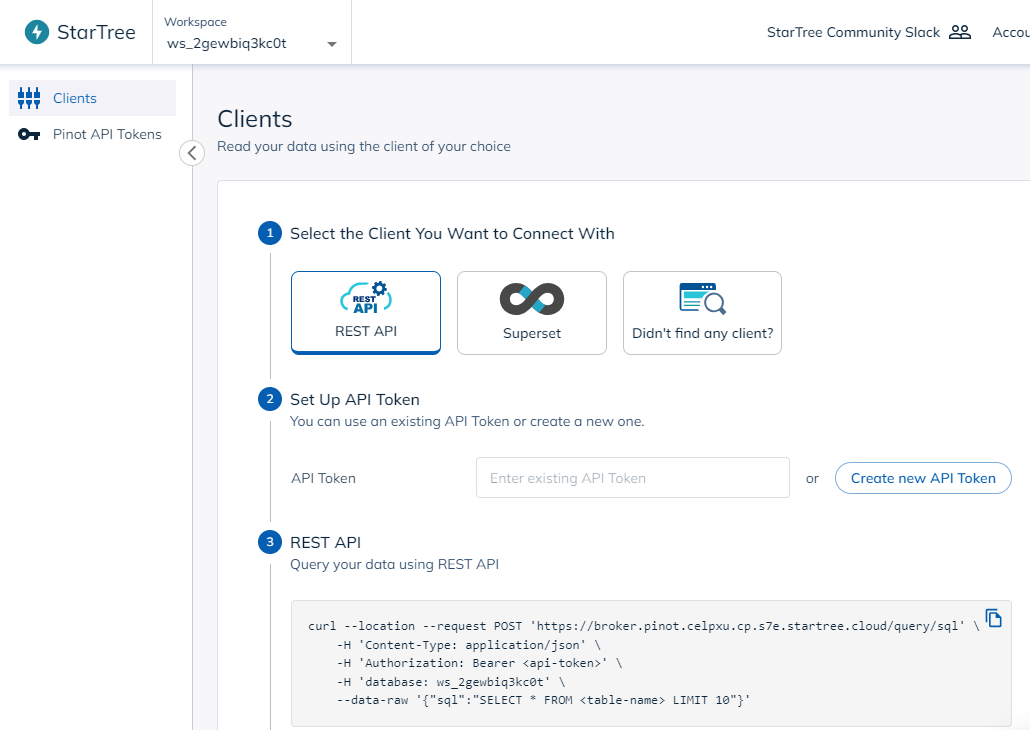
Next, we will create an API token in StarTree Cloud, create a Superset connection string, and use it to connect our Superset deployment to StarTree Cloud.
From StarTree Cloud, choose configure clients:
This will bring you to a screen where you can create an API token:
Click on the Superset tile, then create a new API token:
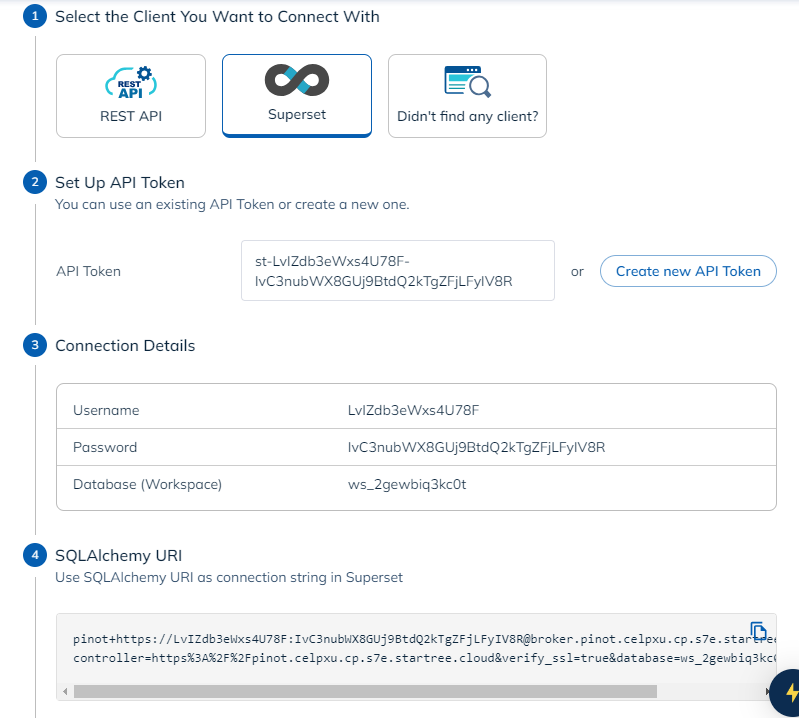
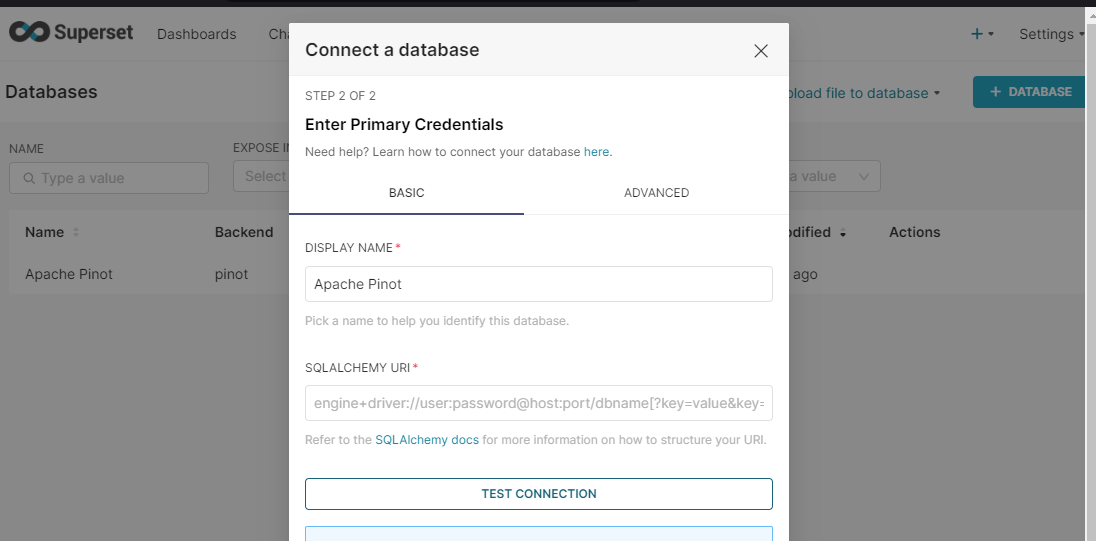
Once you create a token, copy the SQLAlchemy URI and paste into Superset to create a new database connection. To do this, from the Superset tab, select Settings, Database Connection, + Database. Choose Apache Pinot from the dropdown, and paste the SQLAlchemy URI.
Now, you are ready to import your dataset into Superset and create some amazing dashboard. Here’s a sample:
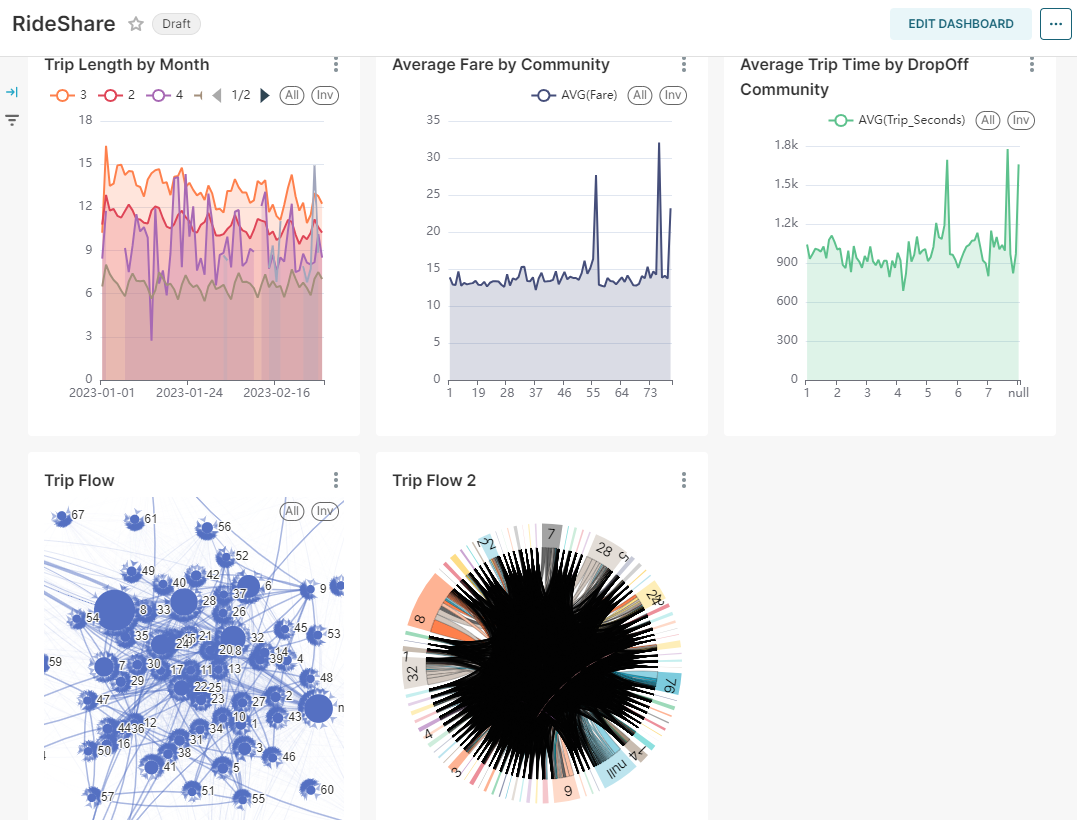
And there you have it!
Concluding thoughts
Want to give StarTree Cloud a spin? StarTree Cloud SaaS is ideal for testing and development. Check it out, and you’ll be running queries in no time! Request a Trial and start running queries in minutes.